
Please note: The contentpass feature is not available in all packages.
The consentmanager CMP has an integrated connection to the contentpass payment gateway. Once enabled, it allows a visitor to choose a) to give consent to advertising and therefore continue browsing the website for free or b) to pay a small amount and therefore continue browsing the website without advertising.
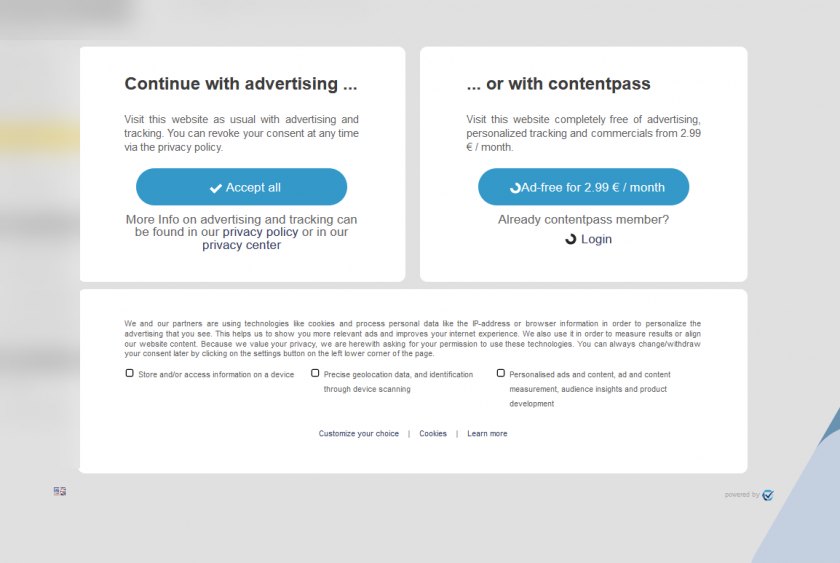
How to use the contentpass Integration?
In order to use the contentpass integration you need to perform the following steps:
- Register with contentpass here.
- Once you registered, you will receive a contentpass ID and a (sub-)domain name that you will setup during the onboarding process.
- Setup your DNS to match the subdomain that is given by contentpass.
- Setup your consentmanager account as usual: Use IAB TCF for your advertising vendors, setup your vendorlist, setup your purposes and cookies.
- Login into consentmanager and go to Menu > Designs > Create new design.
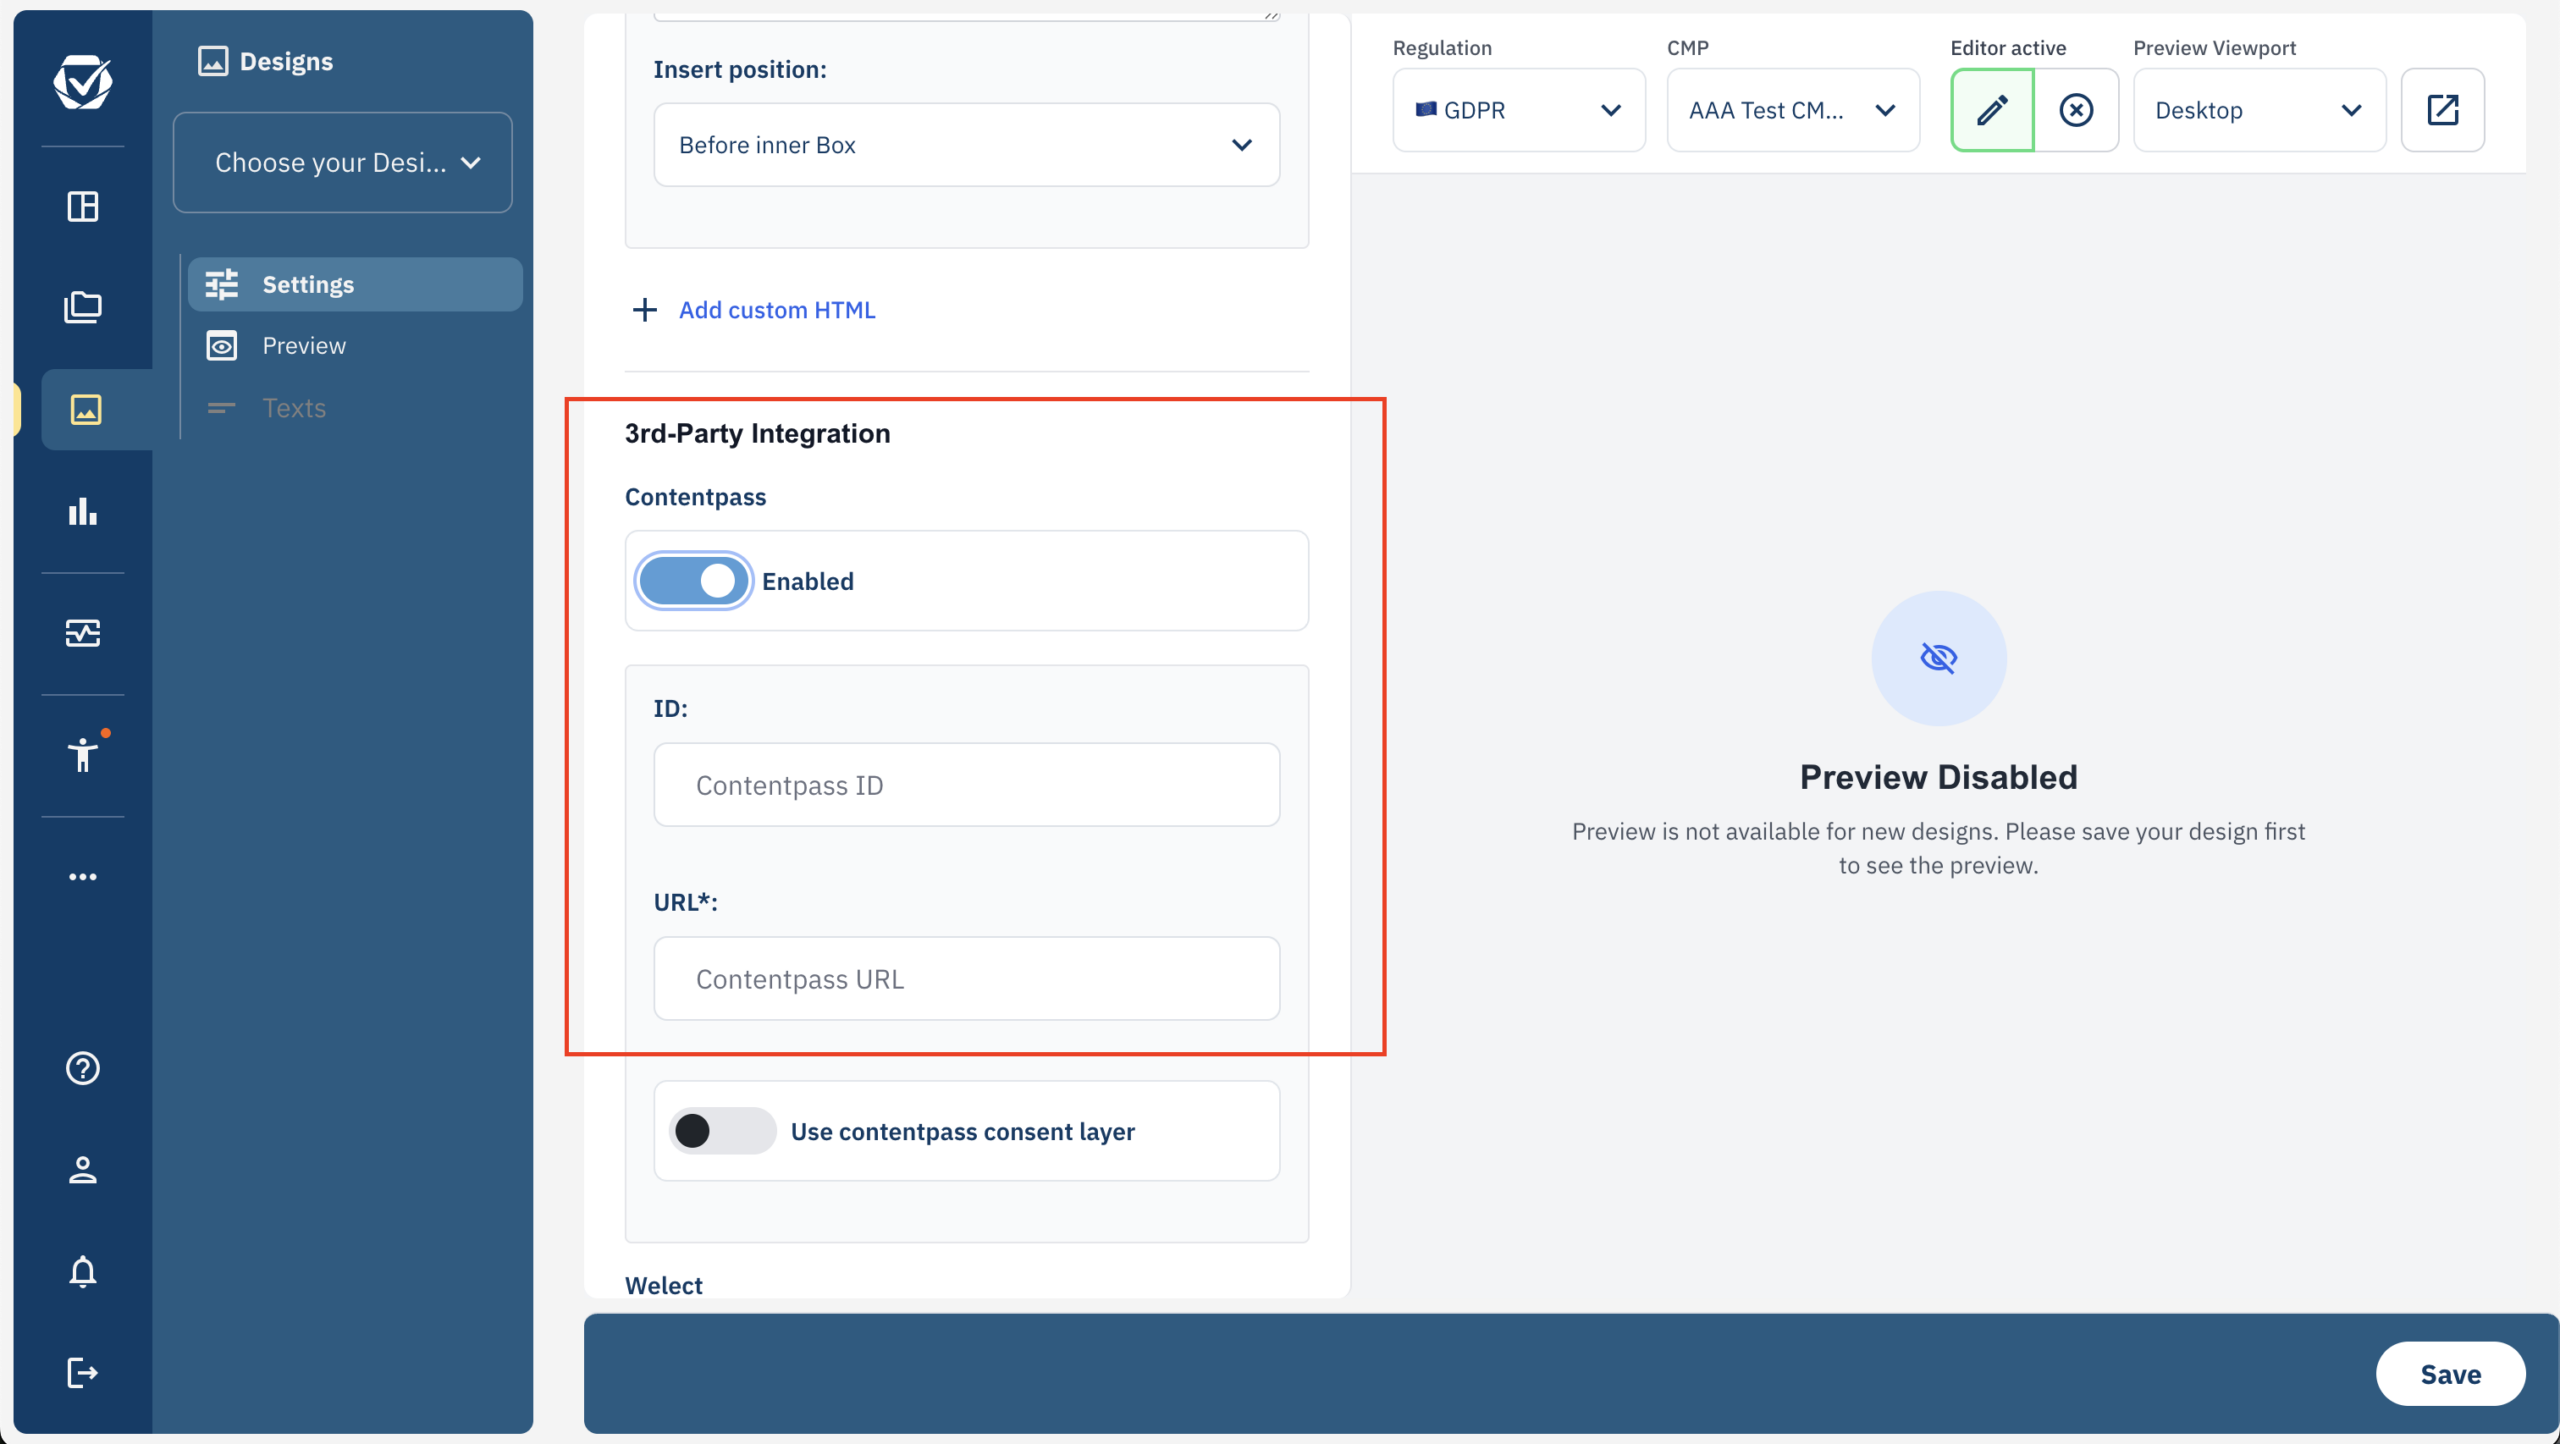
- Scroll down to the box “Contentpass Integration” and enable it. Insert your ID and contentpass-URL (usually a subdomain like cp.yourdomain.com):
- Style the design as you need (see below).
- Save the design and assign it to your CMP
- Update your ad-codes on your website for contentpass blocking (see below).
Blocking ads if the user has a paid subscription
For users that have a paid contentpass subscription you should block all ads and 3rd party tracking from your website. In order to automate the process you need to add the HTML attributes class="cmplazyload" and data-cmp-block="contentpass" to all ad codes on your website and change any src attribute of the adcodes to data-cmp-src. This is similar to the manual blocking mechanism:
<script class="cmplazyload" data-cmp-block="contentpass" data-cmp-src="https://www.adserver.de/banner/script.js"></script>Customizing the design
When the contentpass integration is used, we recommend to set the following design settings:
- Box Settings > Position: middle/center
- Box Settings > Hide website: Yes
- Box Settings > Box size > Desktop > Max width: 1000px
- Box Settings > Background color: #FFFFFF00
- Welcome page > Purposes > Purposes on first screen: Only list the names (or use macros to place the purposes within the text)
- Buttons > Buttons: Accept
- Buttons > Button Style > Corners: rounded
- Buttons > Button Style > Width: 290px (or wider)
- Buttons > Button Style > Padding: 15px (or wider)
- Custom CSS:
.cmpcontentpassboxleft,.cmpcontentpassboxright,.cmpcontentpassboxbottom{background-color:white; border-radius:10px; padding:40px 64px;}
.cmpcontentpassboxleft{margin-right:10px;}
.cmpcontentpassboxright{margin-left:10px;}
.cmpcontentpassboxbottom{margin-top:10px;}
Once the design is saved and clicked on the preview text box, you will find the option to edit the text displayed on the right side of the welcome screen:
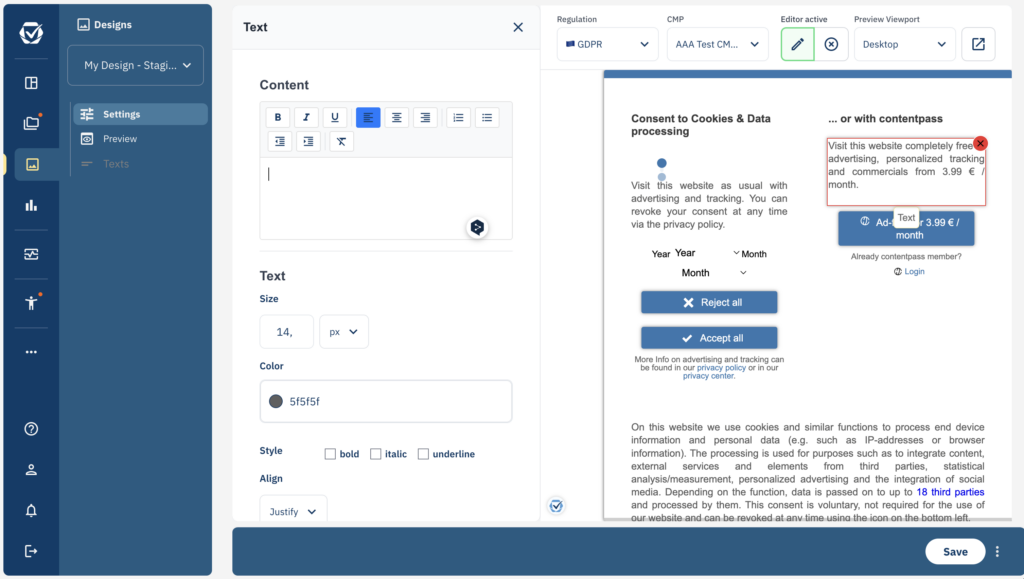
Please note that the order of the elements is changed and some texts are placed on different position when contentpass is enabled compared to when it is not enabled.