Please note: The plugin is designed for Magento 2 | Tested up to 2.4.6+ (PHP 8.2)
In order to integrate the CMP-Code into a Magento Shop please follow these steps:
Installation with composer
- Navigate to your Magento 2 installation folder
-
Add the composer repository for the Consent Manager Magento 2 plugin to your setup.
composer config repositories.magento2-consentmanager git "https://github.com/iubenda/cm-plugin-magento.git" -
To install the plugin, run the below command:
composer require consentmanager/cmp dev-master - To enable the plugin run the below command
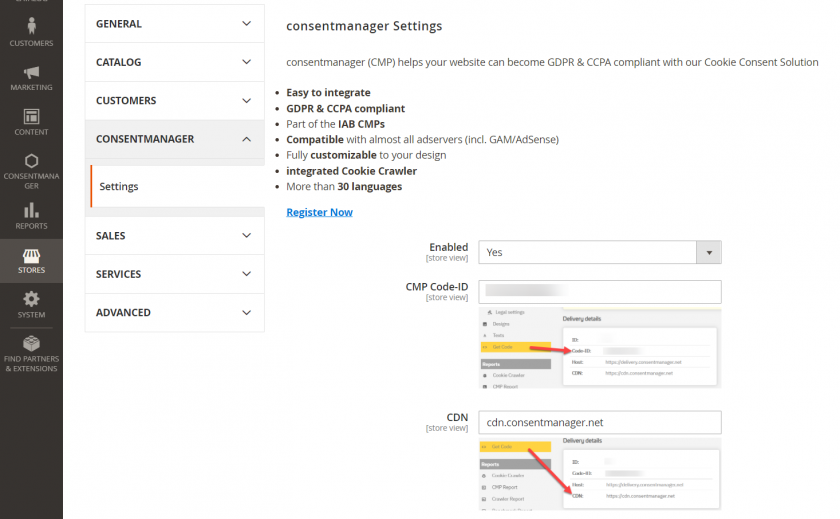
php bin/magento setup:upgrade - Configure the plugin by going to “consentmanager” > “Settings”
- Clear any caches you might have to make sure that the consentmanagenr code appears on all of your pages.
php bin/magento cache:flush
Manual installation
- Download our plugin: https://github.com/iubenda/cm-plugin-magento
- Upload the content to
app/code/Consentmanager/Cmp - Enter following commands to install module:
php bin/magento setup:upgrade - Enable and configure CMP (CMP Code-ID, CDN, HOST, Blocking Mode) in Magento Admin under consentmanager -> Settings
- “Custom HTML Code” is an OPTIONAL input field e.g. for our client side configurations. If you enter anything, please do NOT forget to add the according
<script></script>tags.